Before performing the following operation, you need to have the network connection settings for your CLIÉ(TM) handheld finished.
Refer to the Read This First manual supplied with your CLIÉ(TM) handheld for details.
Getting ready: Setting up the mail account
Note
In order to send and receive e-mail messages with the CLIE Mail application, a setup of mail account is required.
Once a mail account is set, you do not have to go through this process again every time you send or receive e-mail messages.
Once a mail account is set, you do not have to go through this process again every time you send or receive e-mail messages.
Setting the mail account
| 1 |
On the CLIE Launcher screen, rotate the Jog Dial(TM) navigator to select CLIE Mail, and press the Jog Dial(TM) navigator .
Or, tap the CLIE Mail icon on the CLIE Launcher screen.The CLIE Mail application starts. |
|---|---|
| 2 |
Tap Menu
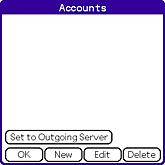
The Accounts screen appears. , Options, then Accounts. , Options, then Accounts. |
| 3 |
Tap New.
The New Account screen for entering your name appears.
|
| 4 |
Enter your name and tap Next.
The screen for entering your e-mail address appears.
|
| 5 |
Enter your e-mail address and tap Next.
The screen for entering the e-mail server names appears.
|
| 6 |
Enter the e-mail server names of incoming (POP3) and outgoing (SMTP) mail
servers and tap Next.
The "Internet Mail Logon" screen appears for entering the e-mail log-on settings.
|
| 7 |
Enter the account name and password your Internet service provider has given you, and tap Next.
|
| 8 |
Tap Finish.
A new e-mail account is entered on your CLIÉ(TM) handheld.
|
Editing the registered mail account
| 1 |
On the CLIE Launcher screen, rotate the Jog Dial(TM) navigator to select CLIE Mail, and press the Jog Dial(TM) navigator .
Or, tap the CLIE Mail icon on the CLIE Launcher screen.The CLIE Mail application starts. |
||||||||||
|---|---|---|---|---|---|---|---|---|---|---|---|
| 2 |
Tap Menu
The Accounts screen appears. , Options, then Accounts. , Options, then Accounts. |
||||||||||
| 3 |
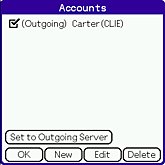
Tap the desired mail account to edit, then tap Edit.
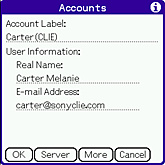
The Accounts screen appears. You can change the following items:
|
||||||||||
| 4 |
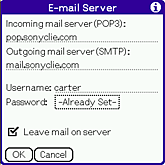
Tap Server when you want to change the E-mail server information.
The E-mail Server screen appears. You can change the following items. Change those items following the information from your ISP.
|
||||||||||
| 5 |
When data input is complete, tap OK.
The Accounts screen appears.
|
||||||||||
| 6 |
Tap More.
The Detail screen appears. You can change the following items. Change those items following the information from your ISP.
|
||||||||||
| 7 |
When data input is complete, tap OK.
The Accounts screen appears.
|
||||||||||
| 8 |
Tap OK.
The e-mail account is set again on your CLIÉ(TM) handheld.
|
||||||||||
| 9 |
Tap OK.
The screen returns to the e-mail list.
|
Using two or more mail accounts
You can set up to eight mail accounts.
For details, see “Changing e-mail accounts”.