Using PhotoStand
You can place your CLIÉ(TM) handheld in the cradle and display the stored images one after another on your CLIÉ(TM) handheld screen (PhotoStand). You can also display the current time on the screen during the PhotoStand slideshow and use your CLIÉ(TM) handheld as a clock.
Making a PhotoStand file
You will first need to specify images to be used and make settings for a PhotoStand slideshow.
| 1 |
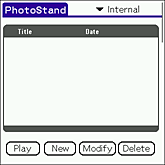
Rotate the Jog Dial(TM) navigator to select PhotoStand
and press the Jog Dial(TM) navigator .
The PhotoStand application starts.Or tap the PhotoStand icon on the CLIE Launcher screen.  |
||||||||||||||||
|---|---|---|---|---|---|---|---|---|---|---|---|---|---|---|---|---|---|
| 2 |
Tap the arrow
Select Internal to use still images stored on your CLIÉ(TM) handheld, or select MS to use still images stored on “Memory Stick(TM)” media. in the upper-right corner of the screen to select the media which stores the image that you want to use. in the upper-right corner of the screen to select the media which stores the image that you want to use. |
||||||||||||||||
| 3 |
Tap New to create a PhotoStand title.
Or, tap The list of available image files appears on the screen. |
||||||||||||||||
| 4 |
Tap the check box to select the image(s) that you want to display.
To select all images, tap Select All. Note
If you are making a PhotoStand setting from the CLIE Viewer application, be sure to select images stored on the same media. When you select images from both your CLIÉ(TM) handheld and the “Memory Stick(TM)” media, a Multiple storages dialog box appears and warns you to select data stored on the same media as the one selected at first.
|
||||||||||||||||
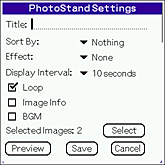
| 5 | Tap OK.
The PhotoStand settings screen appears. |
||||||||||||||||
| 6 |
Make your settings.
|
||||||||||||||||
| 7 |
Tap Save. The image files you have selected in step 4 and the settings you have made in step 6 are saved with a PhotoStand title. You can check the settings before saving the file by tapping Preview. Tap Select to reselect image files again. |
Note
Do not copy PhotoStand files between the “Memory Stick(TM)” media and your CLIÉ(TM) handheld. A malfunction may occur.
Starting PhotoStand
| 1 |
On the CLIE Launcher screen, rotate the Jog Dial(TM) navigator to select PhotoStand and then press the Jog Dial(TM) navigator .
Or, tap the PhotoStand icon on the CLIE Launcher screen.
The PhotoStand application starts.  |
|---|---|
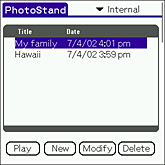
| 2 | Tap the PhotoStand title that you want to play. |
| 3 |
Tap Play.
The PhotoStand slideshow starts. |
Note
The icon for PhotoStand slideshows will not appear on the CLIE Launcher screen. Start the PhotoStand application to play the PhotoStand slideshow.
Stopping the PhotoStand slideshow
Tap on the screen.
When BGM is playing, tap on the screen to display the AV Controller dialog box and tap Finish.
Controlling BGM during PhotoStand slideshow
Tap on the screen during the PhotoStand slideshow to display the AV Controller dialog box.
You can adjust the volume and fast forward or rewind the BGM as necessary.
You can adjust the volume and fast forward or rewind the BGM as necessary.
Tip
You can also fast forward or rewind the BGM using the supplied remote control.
Changing PhotoStand settings
Tap to select a PhotoStand title that you want to change in step 2 above. Then, tap Modify.
Deleting PhotoStand settings
Tap to select a PhotoStand title that you want to delete in step 2 above. Then, tap Delete.