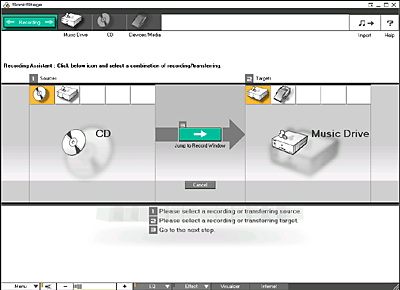
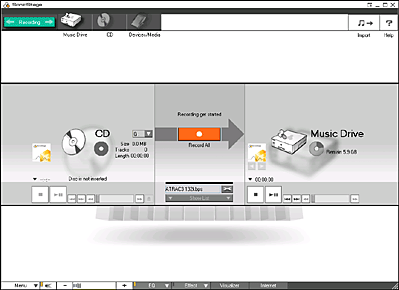
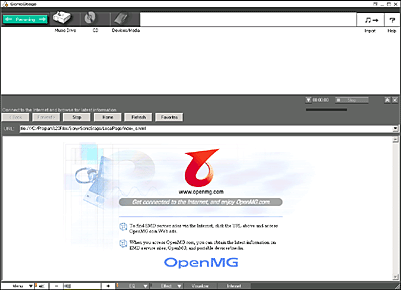
Using the SonicStage software, you can manage ATRAC3-format audio files recorded on your computer as a “Playlist”.
Install the SonicStage software on your computer from the supplied Installation CD-ROM. For detail on installation, see “Installing the SonicStage software” and the supplied Read This First manual.
Before installing the SonicStage software, read “Requirements for SonicStage”.
Importing audio files into your computer (in ATRAC3 format)
Importing ATRAC3-format audio files into your computer
To manage audio files with the SonicStage software, you need to store audio files on the hard disk of your computer.
There are three ways to import audio files into the SonicStage software on your computer:
| • | record audio CDs onto the hard disk |
|---|---|
| • | import songs via EMD |
| • | import MP3, WAV, and WMA files by converting it to ATRAC3 format (Some files does not converted into ATRAC3 format. See SonicStage Help for details. To play MP3 files without converting them into ATRAC3 format, skip this section and go to “Transferring audio files from your computer to your CLIÉ handheld”) |
To stop recording
Click  (Rec Stop).
The recording stops.
The recording stops.
To add songs to an existing Playlist
| 1 | On the left side of the list area, click on the check box to select the songs that you want to record. |
|---|---|
| 2 | On the right side of the screen, click the Playlist to which you want to add songs to. |
| 3 | Click  (Start Rec). (Start Rec).
The recording starts. |
About Bit Rates
In the SonicStage software, the bit rate for recording an audio CD can be chosen from 132 kbps/105 kbps/66 kbps. The sound quality and available recording time after the conversion will be different depending on the selected bit rate. A Higher value makes the sound quality better, but the size of the recorded data file will be bigger thus shortening the total Check-Out time available on your CLIÉ handheld.
Likewise, a lower value means lower sound quality, but lengthens the total Check-Out time available on your CLIÉ handheld.
When you use 128 MB “MagicGate Memory Stick” media, you can record for approximately the following length of time:
Likewise, a lower value means lower sound quality, but lengthens the total Check-Out time available on your CLIÉ handheld.
When you use 128 MB “MagicGate Memory Stick” media, you can record for approximately the following length of time:
| • | When you record at 132 kbps: approx. 120 min. |
|---|---|
| • | When you record at 105 kbps: approx. 160 min. |
| • | When you record at 66 kbps: approx. 240 min. |
To enter a title for an album or a track
You can enter the title by typing on the keyboard, or by using the titles stored on the HDD CD database on your computer or a database on the Internet.
See the SonicStage Help files for details.
See the SonicStage Help files for details.
Importing songs via EMD
What is an Electronic Music Distribution (EMD) service?
EMD stands for Electronic Music Distribution, which is a generic name for services that distribute digital audio content via the Internet or other kinds of networks.
Downloading audio files from EMD service websites
You must be able to access the Internet from your computer. Sign up with an Internet service provider, properly configure your computer, and configure the settings of your Web browser before using this service.
Tip
The OpenMG Home Page provides a guide to EMD service websites that support OpenMG and information on how to use EMD services.
Refer to this OpenMG Home Page for more information about importing audio files using EMD services.
Refer to this OpenMG Home Page for more information about importing audio files using EMD services.
| 1 |
Access the website of an EMD service.
EMD services supporting the OpenMG technology are introduced on the OpenMG Home Page.
|
||||||||||
|---|---|---|---|---|---|---|---|---|---|---|---|
| 2 |
Click an audio file for downloading (MP3 files or WMT-compatible files).
Downloading starts automatically.If you click an audio file that requires purchasing, the default Web browser starts up to display the online transaction page. After the process is completed, the audio file is allowed to be imported into the SonicStage software. |
||||||||||
| 3 |
Import downloaded audio files into the SonicStage software.
If audio files are imported automatically, they are registered as “Download Files” Playlist, determined by the EMD service.If they are not imported automatically, select the audio files you want in the Import window and then import them into the SonicStage software (see “Importing MP3, WAV and WMA files to the SonicStage software”). Note
Audio files cannot be imported automatically if you use a Web browser (for example, Internet Explorer or Netscape) other than the Internet window of the SonicStage software. In this case, specify the audio files in the Import window to import them.
Tip
Some Internet settings (for example, proxy server) are related to the settings of Internet Explorer. If your computer is set to be used within a firewall, etc., confirm the settings of Internet Explorer before the connection.
|
Note
When specifying the location to be used to store songs, do not choose a folder on removable media, such as a CD-R, CD-RW, MO, or ZIP.
Choose a folder on the hard disk of your computer.
Importing MP3, WAV, and WMA files to the SonicStage software
You can check out audio files in format not compatible with your CLIÉ handheld by converting them into ATRAC3-format audio files using the SonicStage software. The following audio files can be imported into the SonicStage software.
To play MP3 files without converting them into ATRAC3 format, see “Transferring MP3-format audio files to your CLIÉ handheld”.
To play MP3 files without converting them into ATRAC3 format, see “Transferring MP3-format audio files to your CLIÉ handheld”.
| • | MP3 files: 16 bit MP3 files, monaural/stereo, 32 kHz/44.1 kHz/48 kHz. |
|---|---|
| • | WAV files: linear PCM WAV files, 16 bits, monaural/stereo, 32 kHz/44.1 kHz/48 kHz. |
| • | WMA (Windows Media Audio) files downloaded via EMD: 16 bit WMA files compatible with WMT (Windows Media Technology), monaural/stereo, 44.1 kHz. Depending on the copyright protection, some WMA files may not be available for importing. |
Importing procedures
You can convert audio files either when you import them into the SonicStage software, or when you check them out from the software to the CLIÉ handheld.
| 1 |
Click Import in the upper-right corner of the screen.
The Import window appears.
|
||||||
|---|---|---|---|---|---|---|---|
| 2 |
Click Import All.
The File format after import dialog box appears.
|
||||||
| 3 |
Select settings.
|
||||||
| 4 |
Click OK.
|
||||||
| 5 |
Click Next.
The audio files in the selected file type which can be imported into the Music Drive are listed.
|
||||||
| 6 |
Click and clear the check box of the files that you do not wish to import.
|
||||||
| 7 |
Click Finish.
Importing of the audio files starts. When importing is complete, a new Playlist with the same name as the selected folder is created, and the audio files are imported into that Playlist. |
Notes
| • |
The original MP3/WAV files imported are referenced by the SonicStage software when playing back or checking out the data.
Therefore, to prevent moving or deleting the files, copy them to a specific folder on the hard disk before importing them to the SonicStag software. If the original file is stored on removable media and the source media is removed, the following messages are displayed when you try to play back or check out the data.
|
||||
|---|---|---|---|---|---|
| • | When the original file is on a network, the same messages are displayed when your computer is not connected to the network. | ||||
| • | When you delete an audio file, note that the original MP3/WAV file is also deleted when you select “Delete the song file from PC.” |
Tips
| • | You can import all of the audio files on the drive dedicated on your computer to the SonicStage software at one time. For details, refer to “Importing audio files from your computer” - “Importing songs” in the SonicStage Help. |
|---|---|
| • | If the music title is included in the data, as it is in the ID3 data of MP3 format files, the title is displayed in the Title column of the Playlist view of the SonicStage software. If the title data is not included, the file name is displayed in the Title column. |
Refer to the SonicStage Help files for more information
You can display the Help files by either of the following ways:
| • | Click Start, Programs (All Programs in Windows XP), SonicStage, and then SonicStage Help. |
|---|---|
| • | Start the SonicStage software, and then click on the Help icon. |
 on the main window.

 .
.