| Copying data from your computer using Data Import/Export |  |
Notes
| • |
Make sure you have the Data Export software installed on your computer. (See “Getting ready: Installing Data Export” for details.) |
|---|---|
| • |
Before using the Data Import/Export applications, turn on your computer. |
| • |
Before following the procedures below, insert “Memory Stick™” media into your CLIÉ™ handheld. Do not remove it while it is connected to your computer. Data may not operate properly when the file transfer is interrupted. |
| • |
Data Import may not display any information about transferring data depending on the computer you are using. If this is the case, see the messages on your computer to check if data is being transferred or not. |
| 1 |
Connect your CLIÉ™ handheld to your computer using the USB cable.
|
|---|---|
| 2 |
On the CLIE Launcher screen, rotate the Jog Dial™ navigator to select Data Import and then press the Jog Dial™ navigator.
Or, tap the Data Import icon on the CLIE Launcher screen.
Data Import starts.
|
| 3 |
Tap Connect.
The message "Connected to PC" is displayed on the screen.
Tip
You can also tap the PC Link button on the Media Info screen to connect to your computer.
|
| 4 |
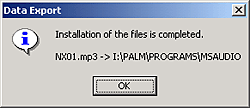
Drag and drop the data item or files that can be used on your CLIÉ™ handheld to the Data Export shortcut icon displayed on your Windows® desktop. Then, click Install.
 If the application file type could not be recognized by Data Export
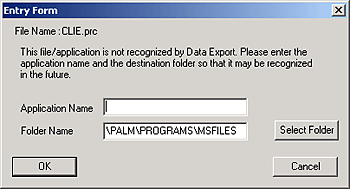
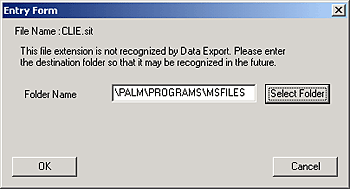
The Entry Form dialog box is displayed.
If the file format of the installed application or data was for Palm OS® based devices (such as .prc or pdb.), enter the application name and select a folder in which to copy the application.
 If the file format of the installed data was for Palm OS® based devices, select a folder in which to copy the application.
 |
| 5 |
When you finish the operation, tap Disconnect.
|
If your computer uses Windows® 2000/Windows® Me/Windows® XP
The warning message is displayed when you tap Disconnect on your CLIÉ™ handheld.
| 1 |
Click OK, and continue operations.
|
|---|
To confirm the contents of the copied data or file
| 1 |
Restart the Data Export software, then click the CLIE Card Drive tab in Data Export.
|
|---|
Note
You cannot copy applications by dragging them to the CLIE Card Drive window in Data Export.
Setting the destination folder for each file format
You can transfer files to a selected folder on “Memory Stick™” media.
| 1 |
In Data Export, click Edit, then click Configuration.
The Configuration dialog box is displayed.
|
|---|---|
| 2 |
Click the File Extension tab.
|
| 3 |
Click Add.
The Configuration dialog box is displayed.
|
| 4 |
Enter the file extension in the File Extension field, then enter the name of the destination folder on the “Memory Stick™” media in the Folder Name field.
|
| 5 |
Click OK.
|
| 6 |
Click OK again.
|