Organizing the files
Deleting files
| 1 |
Tap
The check box for selecting files appears.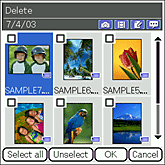 |
|---|---|
| 2 |
Tap the check box of the file that you want to delete.
To select all the files displayed, tap Select all then select the media. |
| 3 |
Tap OK.
The confirmation dialog box appears. |
| 4 |
Tap OK.
|
To cancel the operation
Tap Cancel in step 3 or 4.
Copying the files
| 1 |
Tap Menu
The check box for selecting the files appears. , Data, then Copy. , Data, then Copy.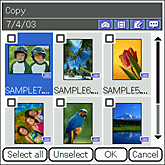 |
|---|---|
| 2 |
Tap the check box of the file that you want to copy.
To select all the files displayed, tap Select all then select the media. |
| 3 |
Tap OK.
The Media Selection screen appears.
|
| 4 |
Tap the arrow
You can copy files within your CLIÉ™ handheld. You can also copy files within a storage media.
|
| 5 |
Tap Copy.
|
To cancel the operation
Tap Cancel in the step 3 or 5 above.
Moving files
You can move the selected files to other media.
| 1 |
Tap Menu
The check box for selecting the files appears. , Data, then Move. , Data, then Move.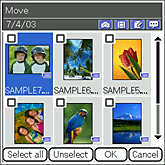 |
|---|---|
| 2 |
Tap the check box of the file that you want to move.
To select all the files displayed, tap Select all then select the media. |
| 3 |
Tap OK.
The Media Selection screen appears.
|
| 4 |
Tap the arrow
Note
You cannot move a file to the currently stored media. |
| 5 |
Tap Move.
|
To cancel the operation
Tap Cancel in the step 3 or 5 above.
Rotating still images
You can rotate still images. It is convenient when you want to view horizontally captured images in different angles of rotation.
| 1 |
Tap Menu
The Select Angle dialog box appears. , Data, then Rotate. , Data, then Rotate.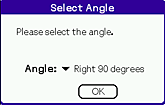 |
|---|---|
| 2 |
Tap the arrow
|
| 3 |
Tap OK.
The check box for selecting the files appears.
|
| 4 |
Tap the check box of the file that you want to rotate.
To select all the files displayed, tap Select all then select the media. |
| 5 |
Tap OK.
|
To cancel the operation
Tap Cancel in the step 3 or 5 above.
Notes
| • | The quality of the image will not change due to rotation. |
|---|---|
| • | The images that you have selected to rotate using this application may not appear rotated in other applications or on a computer. |
Recording printing information on still images (DPOF)
You can record DPOF (Digital Print Order Format) information to the selected files.
The selected image file will be saved on the “Memory Stick™ ” media in DPOF.
The selected image file will be saved on the “Memory Stick™ ” media in DPOF.
| 1 |
On the CLIE Viewer list screen, tap Menu
The check box for selecting the image files appears. , Data, then Print. , Data, then Print.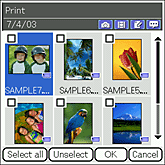 |
|---|---|
| 2 |
Tap the check box of the file that you want to record DPOF information.
To select all the files displayed, tap Select all then select the media. |
| 3 |
Tap OK.
The Print mark setting dialog box appears.
|
| 4 |
Tap Set Mark.
The DPOF information is recorded on the selected image. |
Note
You need a “Memory Stick™ ” media to record DPOF information on the images, since the DPOF information settings are applied only to the still images stored on a “Memory Stick™ ” media.
To cancel the operation.
Tap Cancel in step 3 or 4.