Using the files in other applications
Viewing the images one after another (PhotoStand)
You can select a still image file in the CLIE Viewer application and view images one after another using the PhotoStand application.
| 1 |
Tap
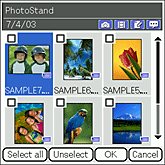
The check box for selecting the image files appears.
 |
|---|---|
| 2 |
Rotate the Jog Dial™ navigator to select a file that you want to use and then press the Jog Dial™ navigator,
or tap to select the desired file.
If you want to select all files displayed, tap Select all then select the media.
Note
You can only select images stored on the same media. When you select images from both your CLIÉ™ handheld and the “Memory Stick™ ” media, a Multiple storages dialog box appears and warns you to select data stored on the same media as the one selected at first.
|
| 3 |
Tap OK.
The PhotoStand application starts and the PhotoStand Settings screen appears.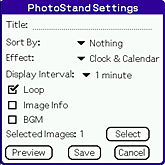
|
| 4 |
Follow the steps after step 6 of Making a PhotoStand files and adjust the settings.
|
To cancel the setting.
Tap Cancel in step 3 or 4.
Placing image in album (CLIE Album)
You can select and paste image files managed in the CLIE Viewer application on an album in the CLIE Album application.
| 1 |
Tap
The check box used for selecting the image files appears. and select CLIE Album from the drop-down list. and select CLIE Album from the drop-down list.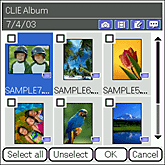
|
|---|---|
| 2 |
Tap the check box to select the still image files that you want to use in an album.
If you want to select all files displayed, tap Select all then select the media. |
| 3 |
Tap OK.
The CLIE Album application starts and the Select Album screen appears.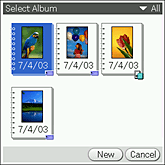 |
| 4 |
Tap the desired album to enter the selected file.
|
To cancel the operation
Tap Cancel in step 3 or 4.
To return to CLIE Viewer
Tap  .
.
 .
.Editing the still images (Photo Editor)
You can draw on a still image using the Photo Editor application.
| 1 |
Tap
The list of image files appears. and select Photo Editor from the drop-down list. and select Photo Editor from the drop-down list.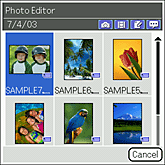 |
|---|---|
| 2 |
Tap on the image to select the still image files that you want to edit.
The Photo Editor application starts. The Create Image Canvas screen appears. 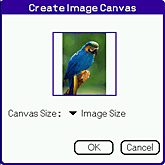 |
| 3 |
Tap the arrow next to Canvas Size and select the desired image size.
Select Image Size to fit the canvas size to the selected image.
|
| 4 |
Tap OK.
See Drawing with Photo Editor for details on editing images.
Note
The edited image is saved on the same media as the original still image.
|
To cancel the operation
Tap Cancel in step 2 or 4.
To return to CLIE Viewer
Tap  .
.